A photo only proves something if it shows the right thing in the right way. A blurry wide shot of a bathroom does not document the crack in the tile grout. A close-up of a stain without a room overview does not tell anyone where the stain is. Photos win disputes, support insurance claims, and guide contractors — but only when they follow a deliberate pattern: context first, then detail, then evidence. This guide teaches non-inspectors exactly what to photograph during a property walkthrough, which angles and framing actually prove condition, and how to avoid the common mistakes that make photo evidence useless when you need it most. If you want a checklist that prompts every photo for you, book a demo.
Photo Documentation Guide
The Right Photos Prove Everything. The Wrong Ones Prove Nothing.
Which angles, details, and context shots to capture so your record actually proves something when it matters.
The Three-Shot Method
Every finding worth documenting needs three types of photos. Miss any one of the three and the evidence has a gap that weakens its value in a dispute, claim, or contractor conversation.
1
Wide shot — Where is it?
Stand in the doorway and capture the entire room. This establishes which room the damage is in. Without the wide shot, a close-up of a crack could be in any room in any house.
2
Medium shot — What is it?
Step closer and photograph the area around the finding. Show the fixture, surface, or system. This narrows the location from "the kitchen" to "the kitchen sink area."
3
Close-up — How bad is it?
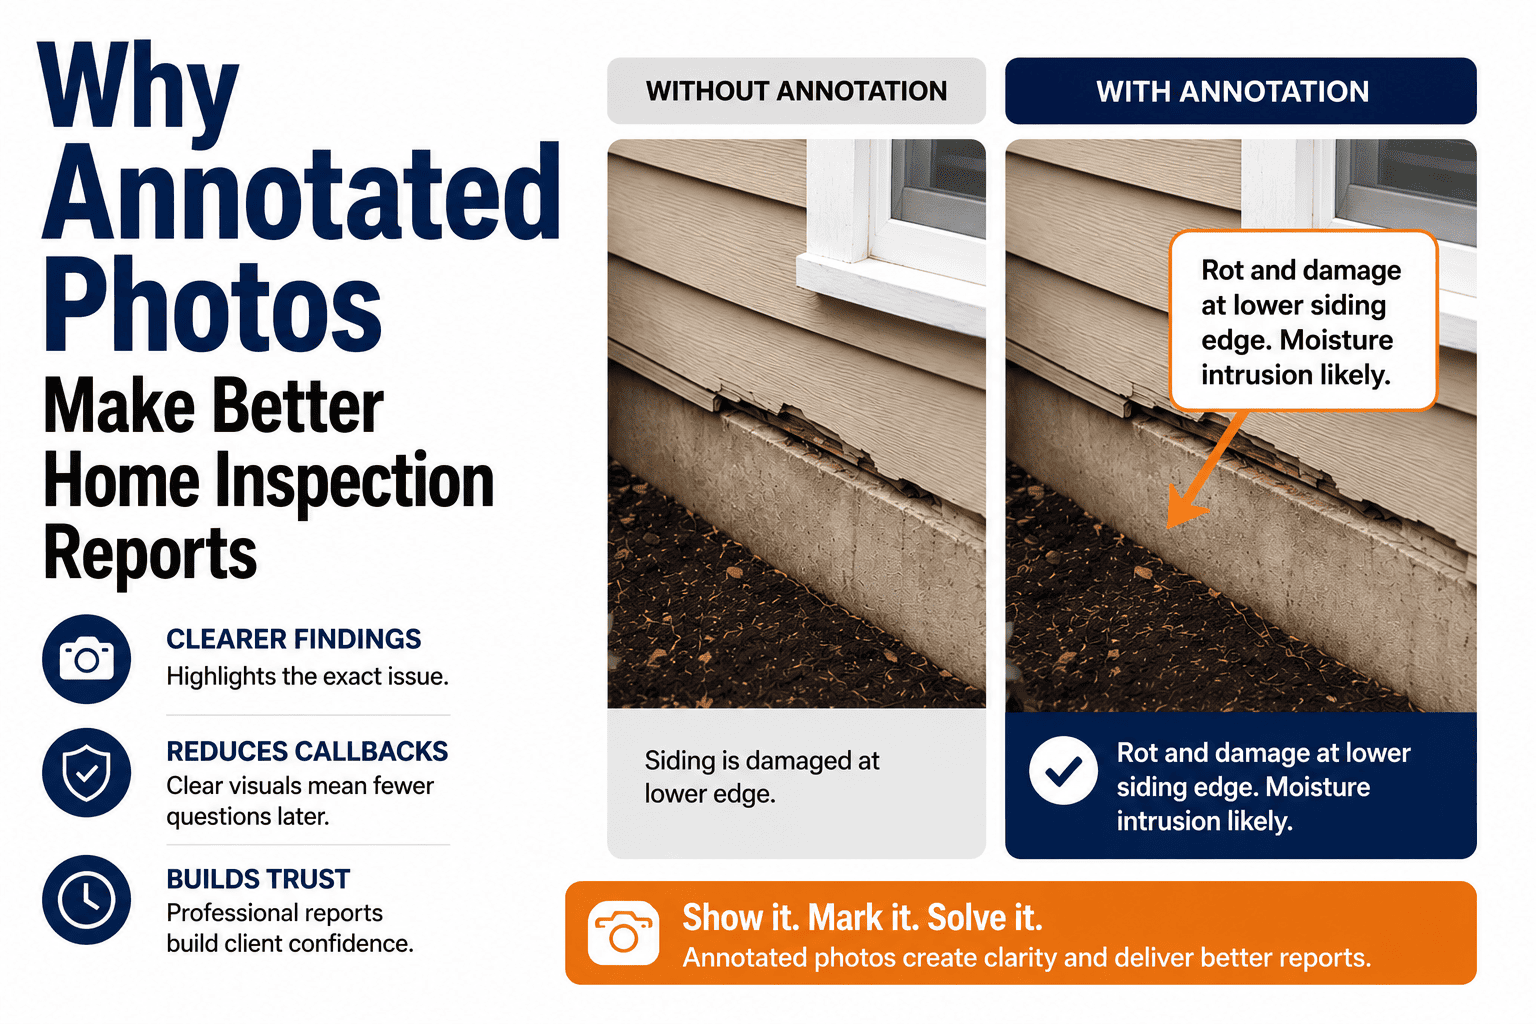
Get close enough that the defect fills most of the frame. This is the evidence photo — the crack, the stain, the corrosion. Make sure it is in focus and well-lit.
What to Photograph in Every Room
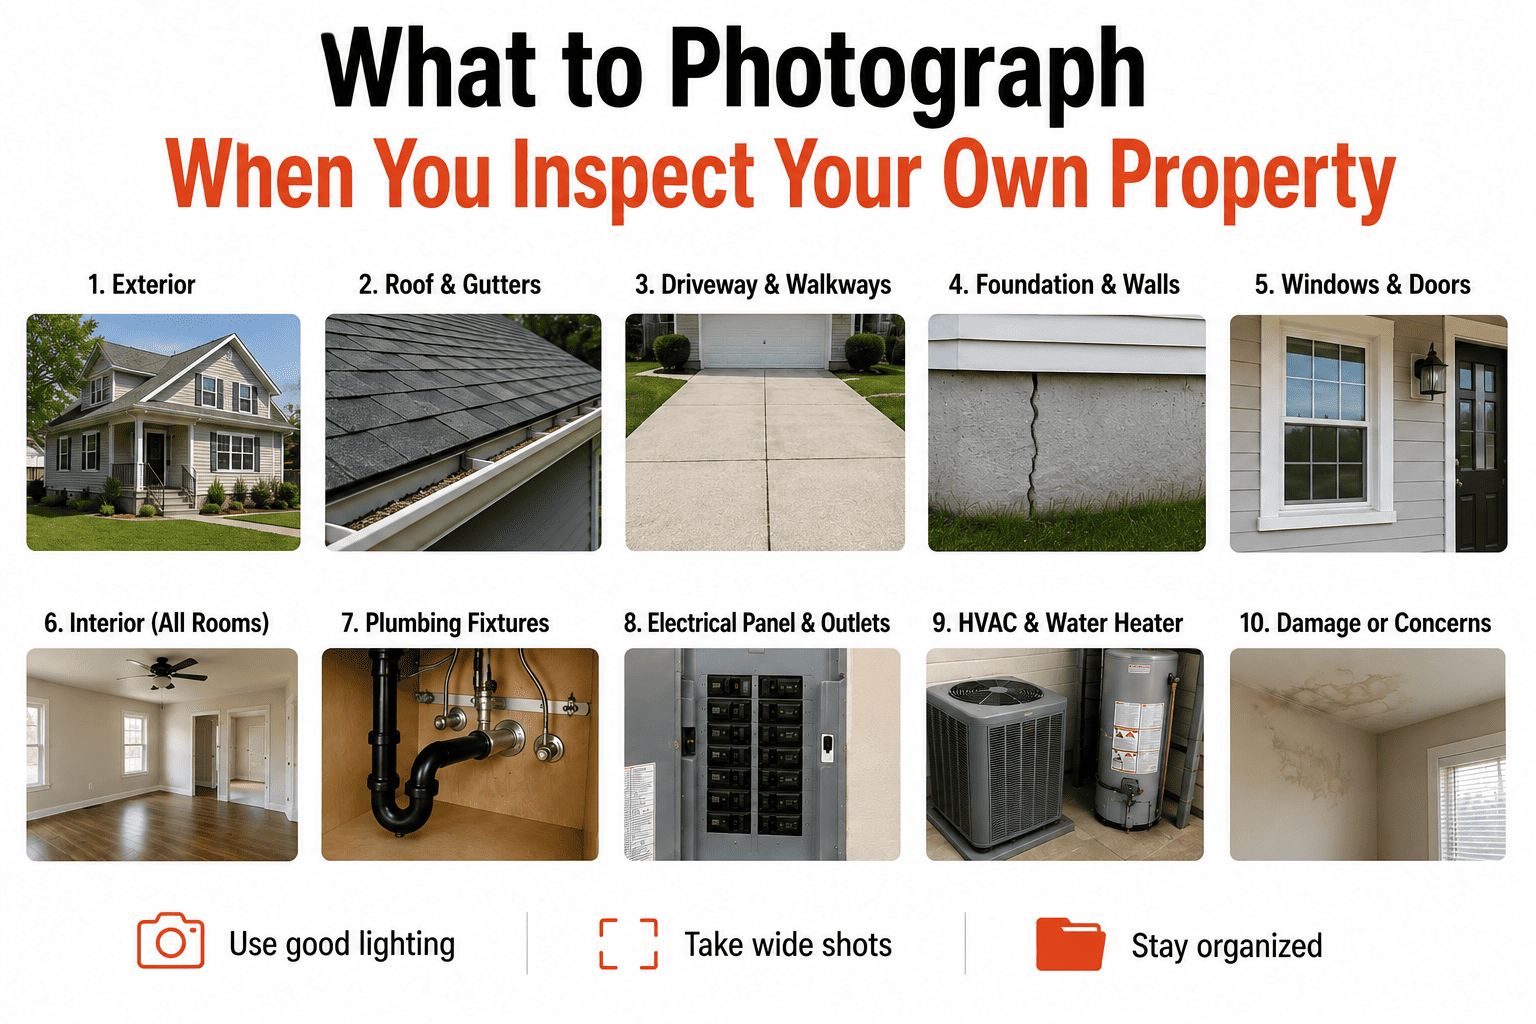
Photograph the baseline condition of every surface and fixture — even when nothing is wrong. "No damage" documentation is just as valuable as damage documentation.
Every room
One wide shot from the doorway. Walls, ceiling, flooring. Doors, windows, blinds, outlets, switches, light fixtures. Any existing damage — scuffs, holes, stains, cracks.
Kitchen
Countertops, cabinet interiors, sink, faucet, under-sink area. Each appliance — oven, dishwasher, refrigerator. Backsplash and flooring near appliances.
Bathrooms
Tub/shower caulk and grout. Toilet base and bowl. Vanity and under-sink. Mirror. Exhaust fan. Towel bars and hardware. Ceiling for stains from above.
Exterior
Each side of the building. Foundation visible surfaces. Gutters, downspouts. Roof from ground level. Doors, windows. Deck, patio, or balcony. Driveway and walkways.
Systems
HVAC data plate. Water heater data plate. Electrical panel. Filter condition. Smoke and CO detectors. Utility meter readings at move-in and move-out.
Damage close-ups
Every scratch, stain, crack, chip, dent, hole, burn, water mark, and missing component. Fill the frame. Ensure focus. Add markup if your app supports it.
The app prompts every photo for you. HomeInspecto tells you what to photograph at each step of the checklist and auto-attaches each image to the correct room and finding — no sorting, no guessing.
Mistakes That Make Photos Useless
Bad photos are worse than no photos — they create a false sense of security that collapses when you actually need the evidence.
Blurry or out of focus
Tap to focus before you shoot. Hold the phone steady. If the image is not sharp, retake it immediately — you will not notice the blur until it is too late.
Too dark or backlit
Use your phone's flash in dim areas. Position yourself so light falls on the subject, not behind it. A dark photo is not evidence — it is a silhouette.
Close-up without context
A close-up of a crack with no room context is unplaceable. Always take the wide shot first so the reader knows where the close-up belongs.
Only photographing damage
Without "before" evidence of good condition, you cannot prove later damage was new. Document the clean rooms too.
The Right Photo at the Right Moment Settles the Argument.
HomeInspecto prompts every photo, auto-attaches it to the finding, and embeds it in a timestamped PDF — so your evidence is organized, clear, and permanent.
Frequently Asked Questions
How many photos should I take per room?
One wide shot from the doorway, then close-ups of every fixture, surface, and any damage. A standard room needs five to eight photos. Kitchens and bathrooms need more. More is always better — you cannot retake a photo after the moment has passed.
Do I need a professional camera?
No. Any modern smartphone is sufficient. What matters is framing, focus, and lighting — not the camera hardware.
Should I photograph things that are not damaged?
Yes. A wide shot of an undamaged room proves the room was in good condition at the time. Without "before" evidence, you cannot prove later damage was new.
Does HomeInspecto prompt me on what to photograph?
Yes. The guided checklist prompts a photo at each relevant step. Every photo auto-attaches to the finding in the report. Book a demo or start a free trial.
Take the Photos That Win. Skip the Ones That Waste Time.
HomeInspecto prompts every photo, auto-attaches it to the right finding, and builds the report as you shoot. Book a demo or try it free.